Pages

Tuesday, December 30, 2014

No Bake Holiday Cookies


For our families Christmas Eve celebration this year the hubby and I made No Bake Cookies. These are a little different than your typical chocolate peanut butter no bake cookies. These cookies are made with marshmallows, food coloring, and corn flakes. They are sweet and amazingly tasty. My only recommendation is to not eat all of them while making them. I normally like to try to make healthy versions, but these are a definite treat. I believe it's okay to have things like these every now and then as long as you pay attention to portion control. Having a cookie is not the end of the world, as long as you don't have 20 cookies in one sitting.


The ingredient list was pretty simple like these cookies. I used Special K Protein Flakes as my little way of saying that this recipe is totally healthy, right? Once I gathered all of my ingredients I placed my pot on the burner on medium-low heat. Start out by adding your 30 marshmallows and stick of butter to the pot and stir until melted. It probably took around 5-7 minutes of stirring until everything was fully melted. You want to make sure you keep stirring as it melts to create the right consistency. 


Once the marshmallows and butter had melted, I removed the pan from the heat and added the food coloring and vanilla. I added just enough to get to the right color for my "wreath" cookies. Once the coloring was right I slowly stirred in the corn flakes. I didn't end up using all the corn flakes the recipe called for. It's always important when making a recipe that you slowly add and adjust everything to fit your needs and make everything exactly how you want.


Once everything was completely mixed together I dropped them onto a non-stick pan 1 tablespoon at a time. I then flattened each one a little to make them look rounder before adding the candies. I chose round chocolate Sixlet candies since they looked so much like the berries you see on Christmas wreaths.

No Bake Holiday Cookies

Prep Time: 15 min
Chill Time: 30 min
Makes: 20-24 cookies

Ingredients
  • 1/2 cup (1 stick) Unsalted Butter
  • 30 large Marshmallows (a 10-ounce bag contains 35-40)
  • 1 to 1-1/2 tsp Green Food Color
  • 1-1/2 tsp Vanilla Extract
  • 3 cups Cornflake Cereal
  • Red Chocolate Candies, for decorating
Instructions
  1. In a medium saucepan, melt butter and marshmallows over medium-low heat, stirring constantly.
  2. When melted, remove from heat and stir in food color and vanilla. Add more food coloring if desired. Stir in cornflakes. 
  3. Drop mixture, 1 tablespoon at a time, onto wax paper. Decorate with Candies.
  4. Place in fridge to cool for 30 minutes.


Enjoy your cookies! These would be great altered in color to match brown Easter baskets with little eggs or red Valentines hearts. 


Sunday, December 28, 2014

Healthy Spinach Salad


My husband and I recently went to Goldberg's with some friends for Dinner. We hadn't originally planned to go to Goldberg's, but with the holiday season all the other restaurants around were 1-2 hour waits. Who has the time to wait that long for the seats, let alone the extra 30 minutes to get your food? Therefore, after looking around we settled on Goldberg's for dinner. They have a pretty amazing Mexican Spiced Hot Chocolate as well as a delicious Spinach Salad. The hubby and I love Spinach Salads. We try one at every restaurant we go that offers it. After all these taste tests of Spinach Salads out at restaurants we finally decided to make our own. 


The ingredient list wasn't huge and I definitely liked that. I want to try out different ingredients on my salads to see what's my favorite. I added purple onions on this salad, but I may go without next time to minimize the acidity in this salad. If you're like me and have issues with heartburn then raw onions are not always your friend. After cutting everything up I also ended up adding in Strawberries. The sweetness of the Strawberries and the Dried Cranberries make the perfect combination with the crunch of walnuts and cucumbers. I think I'll also try out Blue Cheese vs. Feta Cheese to see how the flavors differ in this salad.


In each Salad I had Spinach, sliced Red Onions, halved Cherry Tomatoes, sliced Strawberries, crumbled Feta Cheese, Walnut Pieces, dried Cranberries, and sliced Cucumbers. I started out topping it with Kroger Lite Balsamic Dressing. I wasn't a huge fan of the flavor of it compared to dressings I've had at Restaurants. I wanted to make my own so I tested out some ingredients. I found a simple mixture that tasted amazing. 

-------------------------------------------------------------------------------------

Homemade Sweet Balsamic Vinaigrette

Serves: 2

Ingredients
  • 2 tsp Extra Virgin Olive Oil
  • 1 tsp Honey
  • 1 tsp Dijon Mustard
  • 1 tsp of Balsamic Vinegar 
  • 1 pinch Fresh Basil 

Directions

  1. Combine all ingredients in a bowl and whisk until combined. 
-------------------------------------------------------------------------------------

What's your favorite homemade dressing? I will definitely be making more homemade dressings since they taste so much better and can usually be made with ingredients I have around the house. 


Saturday, December 27, 2014

A Very Merry White Christmas Sangria

My hubby and I are usually the ones who bring the drinks to our holiday get togethers with his side of the family. This year we were having a hard time coming up with new drinks to bring. We wanted something different than our usual cider drinks. Then we stumbled upon a recipe for White Christmas Sangria and had to make it. 


The ingredient list consisted of Chardonnay, White Grape Juice, Club Soda, Sugar, Fresh Rosemary, Cranberries, Granny Smith Apples, and Braeburn Apples. My mom had just given us this Rosemary tree so we thought it would be the perfect source for fresh Rosemary. The tree smells amazing and fresh. I would love to find a scented oil warmer that smells like Rosemary. 


We started out by chopping the apples. We have a Calphalon Easy Grip Apple Slicer that we always use. This thing is truly amazing. Without this awesome little tool I would never eat apples. For some reason I hate eating them right off the core. I like it a lot better when they are sliced in easy bite size pieces. Once they were sliced we chopped them into smaller pieces and dumped them straight into the bottom of the pitcher. 


Next we added the sugar and the cranberries. I used regular sugar, but you could also try Stevia or Sugar in the Raw. I only have individual packets of Sugar in the Raw so I didn't want to have to open enough of those packets to equal 1/2 cup of Sugar so I used my regular stuff. 


After I had added all the fruit and sugar I poured in the whole box of Chardonnay and dropped in the sprigs of Rosemary. Now that everything was in there together and stirred to mix I placed it in my fridge to cool and let all the flavors infuse together. 


Now for the special ingredient, the Rosemary. This ingredient seriously is the make or break for this recipe in my opinion. You start off by rinsing the Rosemary and wetting it to help the sugar to stick. After you dampen the Rosemary place it over a pan to avoid mess and sprinkle sugar all over. You want to coat the Rosemary in sugar so that it looks like it has been "snowed" on, aka why this is called a White Christmas Sangria. I made enough garnish sprigs of Rosemary so we would have two per glass of wine for each person. The smell of the Rosemary mixed with the flavors makes it the perfect Christmas drink. 


White Christmas Rosemary Sangria

Yield: 16-20 servings
Prep Time: 15 minutes + 1 hour to chill

Ingredients
  • 2 Granny Smith Apple
  • 2 Braeburn Apple
  • 1 bag (12 oz) Fresh Cranberries
  • 5 large Rosemary Sprigs (more, for garnish)
  • 5 liters Chardonnay
  • 1 Cup White Grape Juice
  • 1/2 Cup Sugar (more, for garnish)
  • 1 quart Club Soda

Instructions

  1. Start by chopping up the apples, I prefer them in small cubes.
  2. In a large pitcher, combine all of the ingredients.
  3. Mix it well, so that the sugar fully dissolves.
  4. Place the pitcher in the refrigerator to chill. During this time the sugar will fully dissolve and the rosemary will infuse your sangria. 
  5. While that chills, you can make the garnish for this drink. To do this, measure out 1/2 cup of granulated sugar. Lightly wet the rosemary and then give it a good shake to remove any excess water. Then lightly shake the sugar over the Rosemary sprigs until they are coated as you please. 
  6. Once the pitcher has chilled for about an hour, it should be ready to serve.
  7. Enjoy!

Monday, December 22, 2014

Crockpot Skinny Tortilla Soup


Here in Georgia our seasons don't really make sense. It's usually either Winter or Summer and sometimes both happen in one week. This week we seem to be having Winter weather with cold rainy days. All these cold days lately are making me want to eat soup for every single meal. Add to the crappy weather the fact that this week is full of Christmas celebrations and I need to desperately find some Crockpot recipes. Lately I've been craving Mexican food. The idea of an enchilada or tacos makes me salivate. Therefore, I ended up deciding to make a Crockpot Tortilla Soup. With my healthy lifestyle I'm working on now I decided to switch it up and make a "skinny" version of my favorite tortilla soup. 


It was really super easy to make. I normally wake up at 6:00am to leave my house by 6:30am for work. Based on that time range I don't really have a ton of time to meal prep, etc. in my mornings. Therefore I wanted something super easy. This recipe is one of those. The time it took me to prep the soup before throwing it in the Crockpot was probably a total of 5-10 minutes max. 


The ingredient list really wasn't that bad either for this recipe. I bought organic where possible and reduced sodium for anything that wasn't organic. This helped to minimize the salt count and calorie count on this recipe. You can make this recipe even healthier by making homemade pico instead of rotel, or boiling dry beans instead of using the canned version.


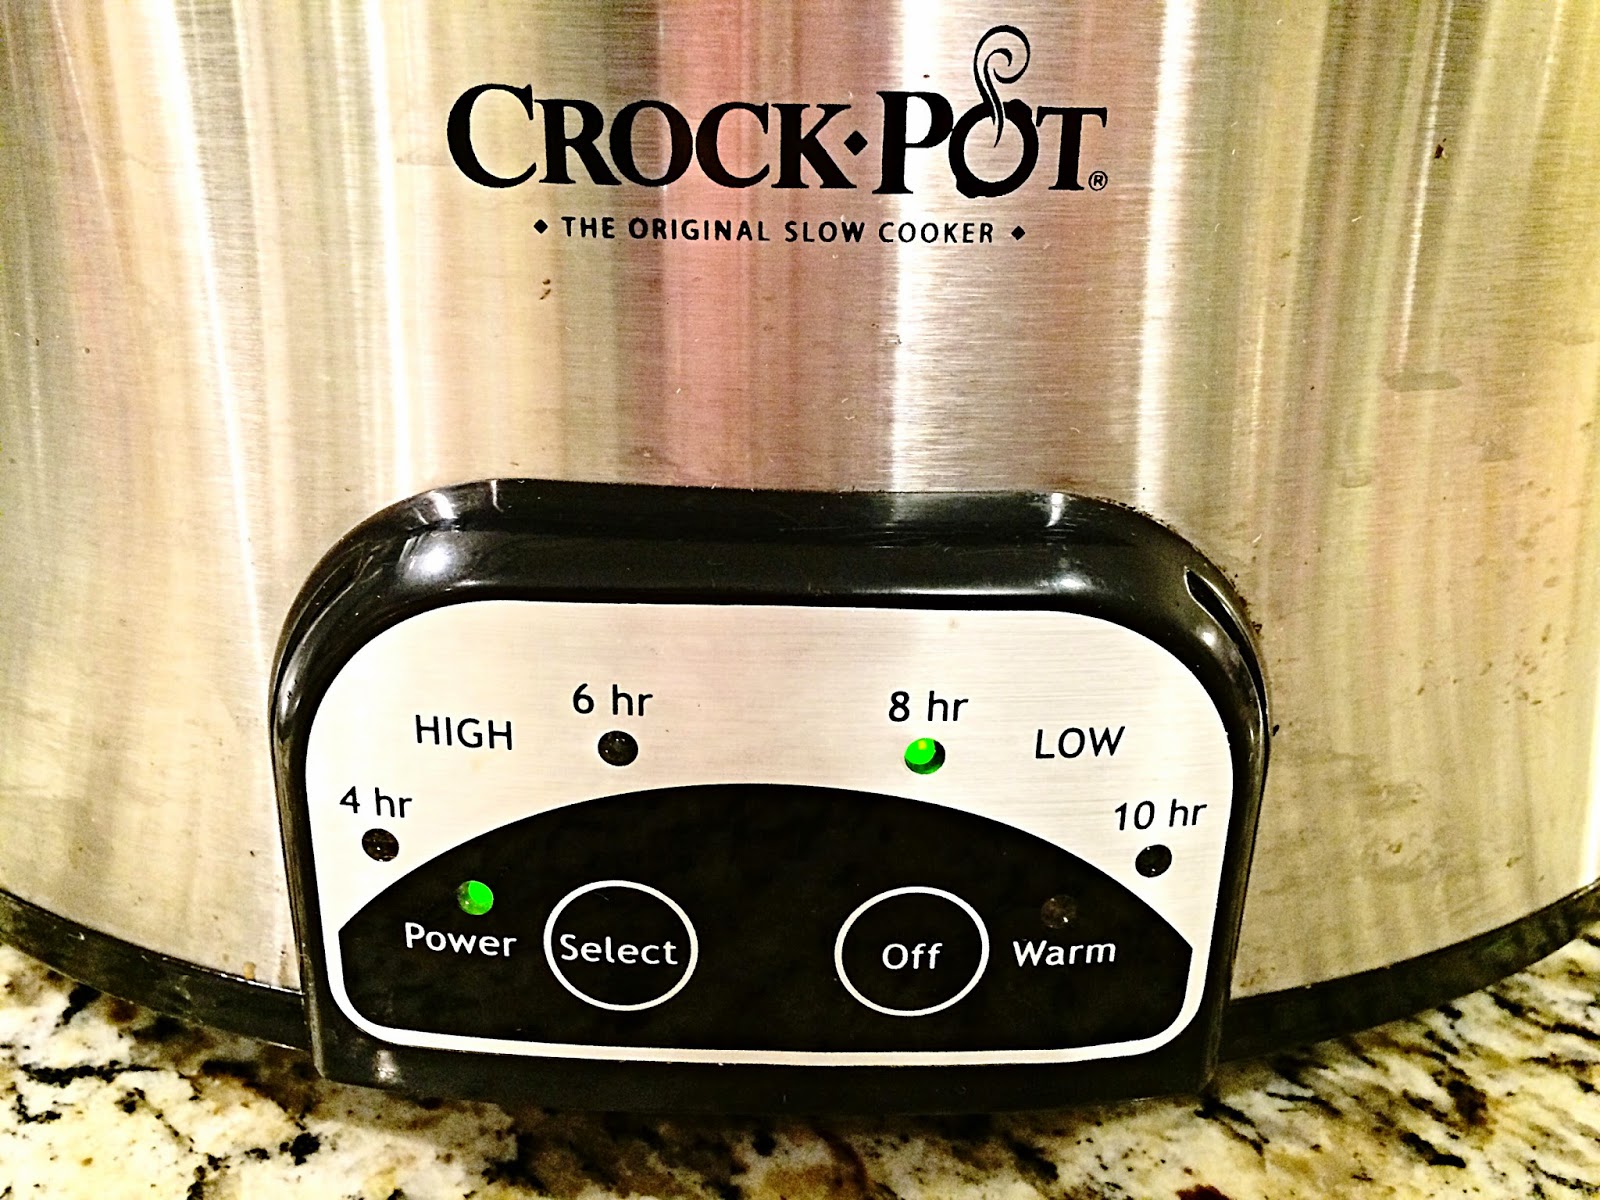
The only prep I had to do was open the cans or containers and dice my onion in my food processor. This seriously is the easiest recipe ever. Once everything was in my Crockpot I stirred everything up and set it to cook on Low for 8 hours. 


My Crockpot has a "warm" setting that it goes to once the time is up and it's finished cooking. This keeps anything I cook in the Crockpot from over cooking and burning to the edges. My Crockpot is really my best friend during the Winter. If you don't have one I highly recommend one.


The warm setting kept the soup at the perfect temperature for my husband and I to eat our dinner as soon as we finished working and working out. The smell alone of the house was amazing. I almost expected to be greeted with chips and salsa at our dinner table since we had the smell of Mexican Tortilla Soup radiating throughout the house. 


I served ours with a scoop of Wholly Guacomole 100 Calorie, Sargento Reduced Fat Cheddar, and Garden of Eatin Blue Corn Tortilla Chips. You could also top it with Sour Cream, Tortilla Strips, sliced Jalapeno Peppers, Lime wedges, or Cilantro garnish. 


Crockpot Skinny Tortilla Soup

Serves: 6
Prep Time: 5-10 minutes
Cook Time: 4-8 hours

Ingredients
  • 2  Tbsp minced Garlic
  • 1 medium Onion, diced
  • 16 oz can reduced-sodium Black Beans, drained & rinsed
  • 16 oz can reduced-sodium Kidney Beans, drained & rinsed
  • 8 oz can Organic Tomato Paste
  • 10 oz package of Yellow Corn, frozen
  • 2 - 10 oz cans RoTel Diced Tomatoes with Chilies
  • 4 oz can Green Chilis
  • 1 packet Reduced-Sodium Taco Seasoning
  • 1 Tbsp Chili Powder
  • 32 oz Reduced Sodium Vegetable Broth
Optional Toppings
  • Guacamole
  • Reduced Fat Sour Cream
  • Sliced Jalapeno Peppers
  • Reduced Fat Shredded Cheese
  • Cilantro, chopped
  • Lime Wedges
  • Tortilla Strips

Instructions
  1. Dice the onions and place at the bottom of the slow cooker. Add remaining ingredients. Mix Well.
  2. Cook on high for 4 hours on High or 8 hours on low.
  3. Spoon soup into bowls and top with optional toppings, if desired.


Garlic Parmesan Zucchini and Tomato Bake

Source
This year for Christmas I'm determined to go the "healthier" route for whatever I bring to the parties. Normally I would just make some cookies or drinks or casseroles. This year I'm doing my part in making the meal not just full of heavy foods that make you feel crappy afterwards. For my Christmas Celebration #1 with my family I am making a Garlic Parmesan Zucchini and Tomato Bake. I thought this would be a good addition because it's super easy to make and doesn't require a lot of ingredients. I know I personally don't have time to make super complicated dishes that take awhile to make while I'm wrapping presents, working out, getting ready, and visiting multiple families. 


All you need for this recipe is some fresh vegetables, garlic, parmesan, and a few spices most everyone has in their kitchen. The only thing I actually had to buy for this recipe was the zucchinis, squash, and tomatoes. Everything else I already had in my kitchen. After I gathered all my ingredients I got to work chopping everything. I used my favorite Joseph Knives. Today I needed the purple serrated knife for the tomatoes, and the green knife for chopping the zucchini and squash. 


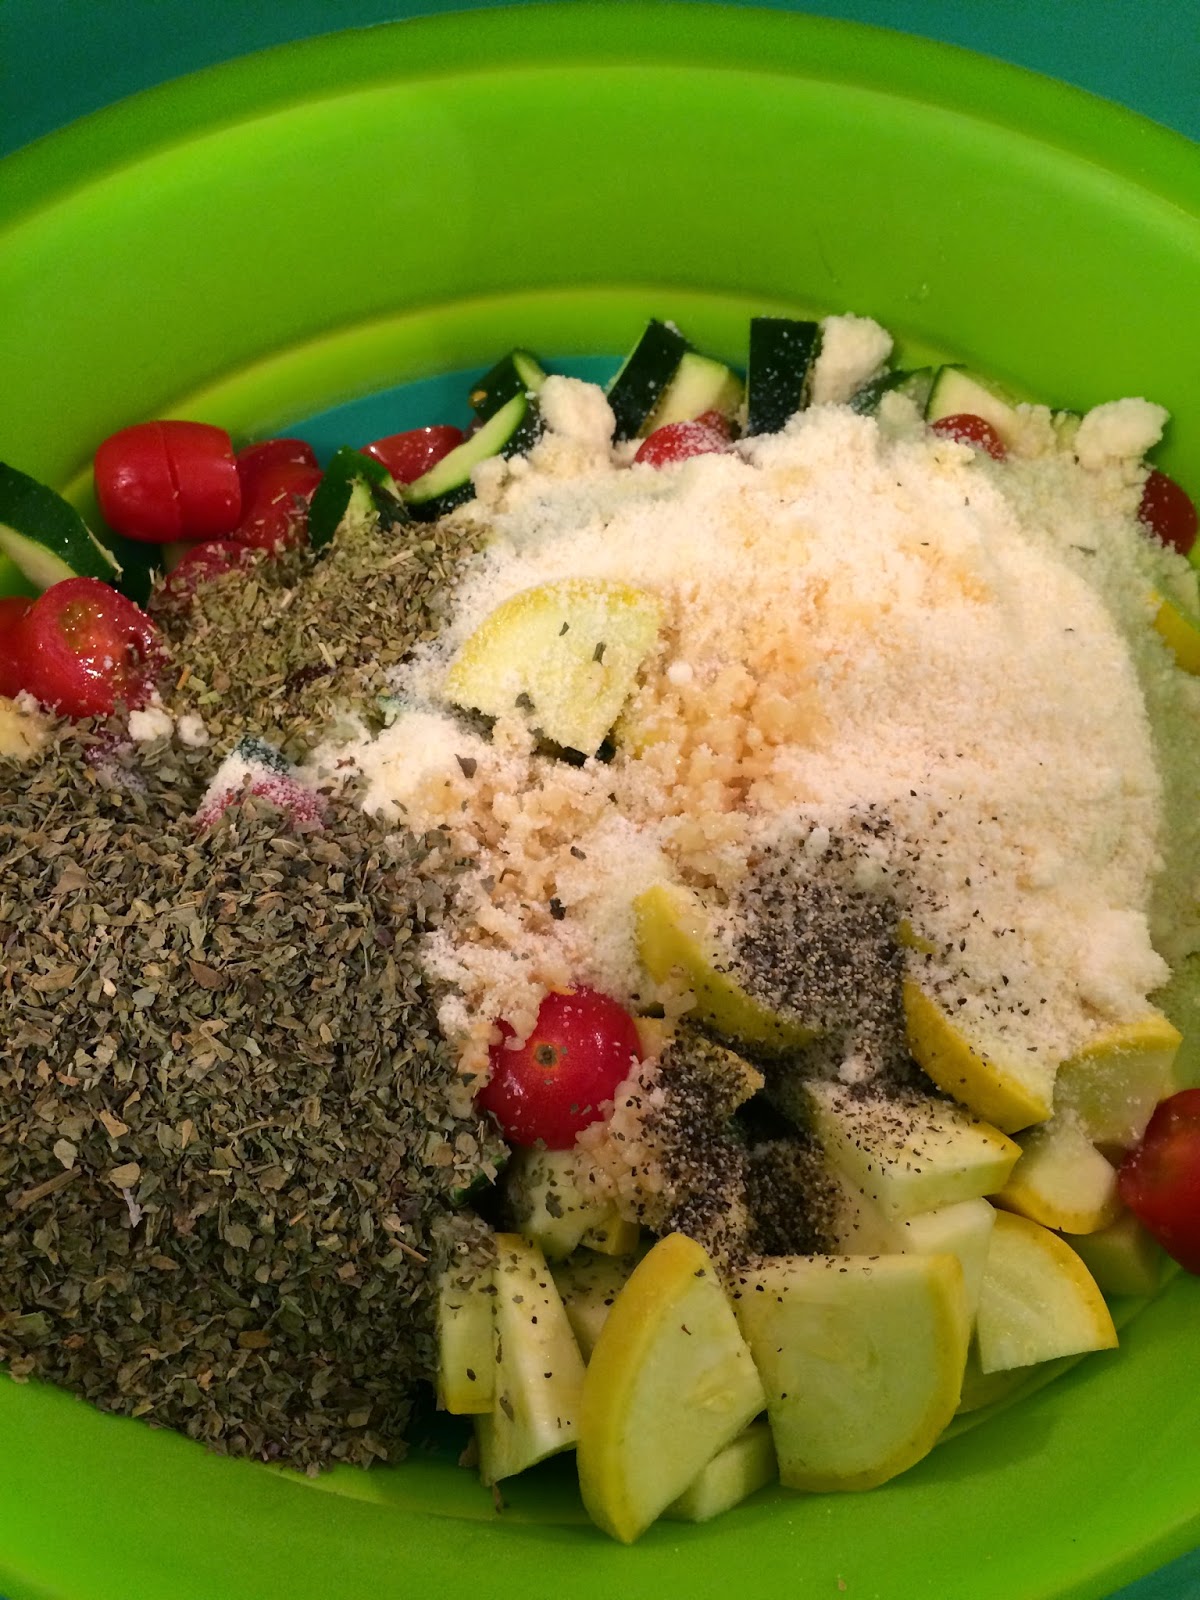
Once everything was chopped I placed it all in a bowl and mixed in all the dry ingredients. I love all the beautiful colors in this recipe. Lately I've been obsessed with Eating in Color. This book truly motivates me to eat healthy and it's a great way to find recipes where I can get my servings of vegetables in. 


The original recipe I followed called for 1/3 cup of parsley or basil. I had basil on hand so I used that. All I have to say is HOLY BASIL BATMAN! The dish tasted like straight up basil with a few vegetables thrown in. I will be remaking this recipe in the near future for a side dish for dinner and I will be using only 1-2 tablespoons of basil. I'm 99% sure it would taste best with 1 tablespoon of basil and a little olive oil. Or even try making it stove top with a little olive oil to saute the vegetables. Try it out and let me know what you think!!


Garlic Parmesan Zucchini and Tomato Bake

Serves: 5
Prep Time: 10 minutes
Cook Time: 25-35 minutes

Ingredients

  • 2 large or 2.5 lbs Zucchini, cut into quarters
  • 10 oz grape tomatoes, cut in halves or 2 large tomatoes, diced
  • 7 garlic cloves, crushed
  • 1/2 cup Reduced Fat Parmesan Cheese
  • 1 tsp basil/thyme/oregano, dried
  • 1/2 tsp ground black peper
  • 1 tbsp parley/basil, finely chopped
  • Cooking Spray
Directions

  1. Preheat oven to 350 degrees and spray an 8X8 baking dish with cooking spray. Set aside.
  2. In a large mixing bowl, add all ingredients, except parsley/basil, and stir to combine.
  3. Transfer to a prepared baking dish and bake uncovered for 25 minutes, then check for doneness. Add 10 minutes if you like well cooked vegetables. Remove from the oven, garnish with basil or parsley and serve hot/warm. 


Saturday, December 20, 2014

P90X3 Month 3 - How to Avoid Holiday Weight Gain

OMG Month 3 has had some hard workouts. I think I like this month a little better though because the weeks are switched up. So week 1 has different workouts than week 2. I think I like that better. I also like that I'm actually starting to improve at a lot of my workouts. When you start P90X3 at Month 1 you seriously believe that you'll never even be close to as good as the people in the video. But thankfully as the weeks go on you get more and more confidence as you get stronger and stronger. 


Bow or Boat pose is one of those no joke workout moves that it takes time and consistency to get. During the first month my chest and thighs were barely off the ground. I kept fighting to get higher and higher though and here I am now rocking the bow pose like a pro during P90X3 Decelerator


Plyo Push-Ups are also a killer. I started P90X3 doing push-ups on my knees. Then I moved on to push-ups on all fours. I even tried on push-ups on the power stands. Then finally this week I decided to try out the Plyo Push-Ups and I did it. I was so proud of myself afterwards, especially when I saw this picture of me mid plyo explosion. I literally look like I'm floating. That's a huge accomplishment there for me. 


Finally there is P90X3 MMX. This video is seriously the hardest one of the bunch to me. In 30 minutes i burned over 400 calories. I mean, why go to the gym and be bored for an hour on the treadmill or eliptical when in 30 minutes you can burn over 400 calories?!?! That's insane right there. This video was so hard though that by the end after the cool down I just wanted to flop down on my mat and catch my breath. I needed a little extra cool down. 

Source

What are you doing to stay active this holiday season? When you workout your body releases endorphins which help you cheer up and relax. Those endorphins are super amazing to help you deal with the holiday stress that comes with buying gifts and fitting everything into a tight schedule. It also helps avoid the extra pounds you'll get from all the holiday foods. 


If you feel like you’ve tried everything to get your results and still aren’t seeing them, then let me help you. Together we can become better than average, and not be just another statistic. Give yourself the gift of health this Christmas and invest in your future and the future of your family. Comment below or visit my site if you are interested in making 2015 the healthiest year of your life.


Here's a great quick holiday workout from my favorite instructor Tony Horton to help you avoid holiday weight gain. If you aren't already doing so I recommend following Tony Horton on Youtube. He's amazing and hilarious and his workouts are awesome! 


Monday, December 15, 2014

Balsamic Tofu & Pineapple Avocado Tacos

I absolutely love finding new Vegetarian recipes that are actually healthy. I have to say this recipe for Balsamic Tofu & Pineapple Avocado Tacos by Rabbit Food for My Bunny Teeth is one of those recipes. I've been craving this recipe ever since I saw it on Pinterest. The mix of tangy balsamic, sweet pineapple, and creamy avocado just sounds perfectly mouthwatering. Even typing this up right now I'm getting hungry thinking about it. Therefore my husband and I decided we had to make it for dinner this past weekend.


We started by gathering all of our ingredients together. This recipe really doesn't have that many ingredients to it so it makes it SUPER easy to make. I love the recipes that have less than 10 ingredients. I hate when I find a super tasty looking meal then check the recipe and theres like 20 plus ingredients. No thanks!!


If you haven't worked with tofu before there are certain steps you must take to prep the tofu for your meal. If you skip this step your tofu will end up being super watery which doesn't make it taste as great and cook as well. You can do this step either before or after cutting up the tofu. I drain my tofu, chop it, then lay it on a plate on top of a paper towel. I then place another paper towel on top, with a plate on top of that. I used my bowl of bananas to press the water out, but you can use anything that's about 1-2 pounds. It's good to let it stand for 20-30 minutes. 


Next I measured out my ingredients and mixed the sauce to create the glaze for the tofu. At first glance it might seem like these would be a weird mixture on tofu, but it's perfection!! Once the glaze was ready I transferred the tofu to the balsamic mixture and let it marinade for 20 minutes. 


I then laid the tofu out evenly on a baking pan lined with parchment paper. I set it to bake for 20 minutes at 400 degrees. After the first 20 minutes I flipped the tofu, drizzled with remaining balsamic glaze, and put it back in to bake for another 10 minutes. While this was baking I prepped the pineapple and avocado. I used my OXO 3-in-1 Avocado Slicer. Since I eat a lot of avocados this thing is basically my best friend!! If you eat avocados as much as me I definitely recommend buying one. It slices the avocado in half, de-pits it, and cubes the avocado all with only 1 tool. I seriously love it!


Once everything was ready I laid out my ingredients and was ready to chow down. Seriously guys this recipe is amazing. It's so refreshing and great for a healthy dinner or lunch option for vegetarians and meat eaters alike. This is definitely a beautiful recipe as well. 


Balsamic Tofu & Pineapple Tacos
Serves 4
Ingredients
  • 1 package extra firm tofu (14oz)
  • 1/4 cup balsamic vinegar
  • 2 Tbsp honey mustard
  • 1/2 Tbsp agave
  • 8 corn tortillas
  • 2 cups pineapple, cubed
  • 1 avocado cubed

Instructions
  1. Drain tofu and place on a few sheets of paper town on a plate. Cover with another few pieces of paper towel and another plate, and weight the top with an object of about 1-2 pounds. Let the tofu stand 20 to 30 minutes to extract excess liquid. 
  2. While the tofu is being pressed, mix together the balsamic, honey mustard, and agave. 
  3. After excess liquid has been extracted from the tofu, chop into small 1/2 inch cubes. 
  4. Transfer tofu cubes into the bowl of balsamic mixture and let it marinade for 20 minutes. 
  5. After tofu has marinated, transfer to a baking pan lined with parchment paper (save excess balsamic for later). 
  6. Bake at 400 degrees for 20 minutes. 
  7. Using a spatula, flip tofu, drizzle with remaining balsamic mixture, and cook for another 10 minutes. 
  8. Toss the tofu with pineapple and avocado, and place in corn tortillas. Enjoy!


Sunday, December 14, 2014

Christmas Mantel DIY

I've written a post before about how much I am obsessed with the company Unfinished Wood Co. They have the cutest monogrammed items that you can customize to match your decor. Now that Christmas is coming up I wanted a Christmas mantel for my living room. I was getting bored of my silver mirror I had up simply because it wasn't a huge eye catcher. I'd been scouring the internet and Pinterest for inspiration. Here are a few of my favorites....


Source
Source
As you can see I have a slight theme to my obsession with mantles. I really wanted something with a deer head or antlers. I DID not want a real deer head that had been mounted because that's not my style. It seemed like I was having a hard time at all the stores I went to however finding a cute deer head. Then I lucked out on Groopdealz  and found an amazing deal on Unfinished Wood Company's Antler Monogram


I feel like this could be used year round if you have a rustic look to your home, but I wanted it specifically for my Christmas mantle. Therefore, as soon as it came in the mail I knew what I wanted to do with it. I ran to Home Depot and got their 12 oz. Gloss Apple Red General Purpose Spray Paint


I love Rust-Oleum spray paint! It always looks great on my projects plus it's a great deal since you get paint and primer in one. For my project I also needed red fine glitter. I already had some in my craft supplies so I gathered everything and went out side to get to work. I started by laying out my monogram on plastic sheeting and placed rocks along the edges to hold the plastic down in case a stray wind decided to mess up my project. I then started spraying. I used 2 coats of the Rust-Oleum to cover the whole thing and make sure no excess wood was showing. I don't think I even used half the container so I have extra for my next Unfinished Wood Co. project I'll be starting once my antler ornaments come in. 


As soon as I finished spraying before the paint was dry I got to work shaking glitter all over the piece.  I used the wet stickiness of the spray paint before it dried to stick the glitter to the antler monogram. I then left it sitting outside for 30-60 minutes to allow ample time to dry. 


As you can see there is glitter everywhere. That is exactly why I did it outside and on top of plastic. Once it was dry I gingerly picked it up and let the loose glitter fall off onto the plastic. I contemplated trying to conserve some of the excess glitter, but decided it just wasn't worth my time during the busy Christmas season. I then bundled up the plastic and threw it all in a bag and straight to my dumpster. After that I carried my new Antler Monogram into my living room and hung it on my mantle.


I still have more to do to "complete" my mantle, but I love how the glitter monogram looks with the glitter on the candle centerpiece and the glitter in the Merry Christmas banner. I think it takes time to accumulate all you need to have a full mantle like the ones you see on Pinterest. I think for our first Christmas in this house I'm pretty proud of what we have so far. I especially love our tree!