Pages

Thursday, October 30, 2014

Cauliflower Crust Pizza

 
Source

I am here to admit that I am a pizza addict. It is literally my favorite food. Back when I used to order Dominoes, just the doorbell ringing would make my mouth water. Then my husband and I would split a medium cheese pizza with spinach, pepperonis, and banana peppers. Somehow being a foot shorter and almost 70 pounds less I was still able to eat just as much as him. I don't think that was a good thing. Especially since usually I would feel pretty stuffed afterwards. I think that was half my problem most of the time. I enjoyed the taste of the few foods I really liked so much that it was hard for me to stop eating them once I started. That eventually led to me just not being happy with what I saw in the mirror. That was not a good thing. That is why now I am making a change. And one of my changes is to find healthier ways to eat the things I love. Therefore I decided to try out a Cauliflower Crust Pizza. At first thought I was like "Uh, no..." I love vegetables, but using them to make a crust just didn't seem like it would give my favorite dish that same yummy taste. Well, I was so WRONG! Cauliflower Crust Pizza is amazeballs!! [I obviously know that's not a word, but it's the best way to describe how good it tasted]


First I had to decide what kind of cauliflower to buy. I did not realize there were so many colors. I'm wondering if anyone knows the difference in the colors. Is one color of cauliflower more nutritious than another? Do the different colors of cauliflower have different flavors? I'm so curious!


Now time to assemble my ingredients. For my crust all I needed was Dried Oregano (you can also use fresh oregano), minced garlic, fat free mozzarella, large eggs, and one large head of cauliflower. I started by chopping off the leaves on the bottom then roughly chopping the cauliflower into florets. I made sure the florets were small enough to fit inside my Food Network Food Processor. I then threw the pieces into the processor and pulsed until the cauliflower resembled rice.


I then placed a lid on top of my microwave safe bowl and microwaved the cauliflower for 10 minutes. While this was microwaving in a separate bowl I mixed the 4 eggs, garlic, oregano, and 2 cups of mozzarella cheese. Once the cauliflower was done "steaming" I carefully took it out of the oven and added the eggs, garlic, oregano, and mozzarella cheese mixture to the cauliflower. I stirred and mixed until the cheese was melted and everything was mixed nicely.


The mixture seems pretty soggy right now, but don't worry it will harden while baking. I then spread the dough onto a greased pan. I used a spoon and my hands to spread the crust to the edges or as close as I could to the edges of my pan. I was hoping for thin crust, so I spread my dough pretty thin.


Doesn't it look nice? To me it basically looks like I used regular dough, but nope I did not. I am cutting out a good portion of the carbs for this recipe option. Lowering your carbs is great for getting rid of the "wheat belly" look. After spreading out my dough I popped the crust into the oven for around ~25 minutes at 425 F. I wanted to get my crust to a light golden brown.


The crust looks so tasty. If I was following the recipe I found I would throw some more cheese on it and cook for 5 minutes. However, I wanted to make this into a pizza. So I added my toppings. I added pizza sauce, turkey pepperonis (for my husband), fat free mozzarella, banana peppers, cherry tomatoes, red peppers, and oregano. Once I got all my toppings placed I popped it back in the oven for 5 more minutes to cook.


Now it's time to enjoy the rewards of my "hard" work. YUM! It was delicious. My husband and I both loved it!!


Ingredients
  • 4 cups of riced cauliflower (about 1 large head of cauliflower)
  • 4 eggs
  • 2 cups of mozzarella cheese
  • 3 tsp oregano
  • 4 cloves garlic, minced
  • salt and pepper to taste
  • 1 to 2 cups mozzarella cheese (for topping)  
    • Optional extra toppings: turkey pepperonis, cherry tomatoes, red peppers, green peppers, banana peppers, spinach, pineapple, ham, chicken, onions, etc...
Instructions
  1. Preheat oven to 425 F degrees. Prepare 2 pizza dishes or a large baking sheet with parchment paper.
  2. Make sure your cauliflower is roughly chopped in florets. Add the florets to your food processor and pulse until cauliflower resembles rice.
  3. Place the cauliflower in a microwavable container and cover with lid. Microwave for 10 minutes. Place the microwaved cauliflower in a large bowl and add the 4 eggs, 2 cups of mozzarella,oregano, garlic and salt and pepper. Mix everything together.
  4. Place the mixture onto the prepared baking sheet and shape into either a pizza crust, or a rectangular shape for the breadsticks.
  5. Bake the crust (no topping yet) for about 25 minutes or until nice and golden. Don't be afraid the crust is not soggy at all. Once golden, sprinkle with remaining mozzarella cheese and other pizza toppings and put back in the oven for another 5 minutes or until cheese has melted.
  6. Slice and serve.

Recipe adapted from: Jo Cooks


Do you need any help figuring out how to meal plan or coming up with ideas for healthy eating? Or just need some help figuring out workouts? Ask me!


<3 Kelly Jean


Monday, October 27, 2014

A Healthier Egg Salad Sandwich

As a vegetarian [a.k.a. very picky person] I have to find different ways to get the protein that I need, especially when I'm working out 6 days a week with P90X3. One way for me is to eat hard boiled eggs or egg salad sandwiches. I am in love with egg salad sandwiches and deviled eggs. My only issue with them is how they aren't super super healthy due to the amount of mayonnaise in them. I was worried with my recent attempts to be a healthier me that maybe I had to fully cut out egg salad sandwiches from my diet. [insert sad face]. Well, thankfully Pinterest came to my rescue. I found a recipe on the Yummy Life and have adapted it to my taste. 

I started out by making the hardboiled eggs. The way I learned to hard boil eggs is to place your eggs in a medium pot with the water level just above the eggs. On high heat you let the eggs sit till they start to boil.


Once they begin to be at a rolling boil then you turn the heat off, leave the pot on the burner and set the timer at 10 minutes. After the 10 minutes has passed remove the pot from the heat and drain the water. I then shake the pot with the eggs in it. This helps to crack the shells and make the removal of the shells easier. 


I then fill the pot with cool water and start to peel the eggs. After everything I have just done the shells tend to almost fall off making it super easy to peel the eggs in one attempt. 


As you can see the shells came off without any pieces or chunks being ripped off the eggs. The site of perfectly peeled eggs makes me a very happy woman! I now need to chop all of my eggs in half.


Now that I have my nicely chopped in half eggs it's easier to place them in my food processor. I use a Food Network Pink Food Processor that I received last year for Christmas. I usually do 10-15 pulses until the eggs are finely chopped. Obviously, you can also just use your knife to chop them up, but I find it's easier to place them in my food processor.


Once they look like this you can place them to the side while you mix the rest of your ingredients. Mix in a bowl 1/3 cup low-fat Greek Yogurt, 1 tablespoon Olive Oil Mayonnaise, 1 teaspoon dried dill, 1/2 teaspoon black pepper, 1 tablespoon Spicy Mustard, 1 tablespoon yellow mustard.


Once you have them nicely mixed you can add it to the diced eggs you sat aside earlier. And mix nicely. 


You are done. You can place on a few pieces of bread with lettuce or make a salad. I chose to make a sandwhich. It was so good. I was really impressed with how creamy it tasted even though there was so much less mayonnaise. 


Ingredients
  • 5 large eggs, boiled and peeled
  • 1/3 cup low-fat Greek yogurt
  • 1 tablespoon olive oil mayonnaise
  • 1 tablespoon minced fresh dill (may substitute 1 teaspoon dried dill)
  • 1 tablespoon spicy mustard
  • 1 tablespoon regular mustard
  • 1/2 teaspoon freshly ground black pepper

Directions
  1. Place your eggs in a medium pot with the water level just above the eggs
  2. On high heat bring the eggs to a boil
  3. Turn off the heat, while leaving the pot on the burner and set the timer for 10 minutes
  4. After 10 minutes remove the pot from the burner and drain the water
  5. Shake the pot with the lid still on over the sink
  6. Remove the lid and fill the pot with cool water.
  7. Peel the eggs, rinse the remaining shell pieces off, and dry the eggs
  8. Cut each egg in half and place in food processor bowl. Pulse 10-12 times until eggs are broken up into small pieces, being careful not to overdo it and puree the eggs. (Or, chop the eggs with a knife.) 
  9. In a separate large bowl, use a fork to whisk together the yogurt, mayonnaise, dill, mustards, and pepper. 
  10. Add the chopped eggs and mix lightly with the fork until well combined. 

(3 Weight Watchers PointsPlus per 1/3 cup serving.)


<3 Kelly Jean


Saturday, October 25, 2014

Sneak Peek into Tony Horton's Workouts


Ever thought about trying out P90, P90X, P90X2, or P90X3 but wasn't sure if it would be the workout for you? Maybe you didn't want to spend the money to buy it without trying it first? Well, you're in luck. First, if you have an XBox ONE you can just go to the Fitness App and there are a few 10-minute workouts with Tony Horton. His workouts are amazing and he's a hoot. Every workout video I am usually laughing, even after doing them a few times. I also  found a few short workouts you can try to decide if you would want to buy the real thing. 

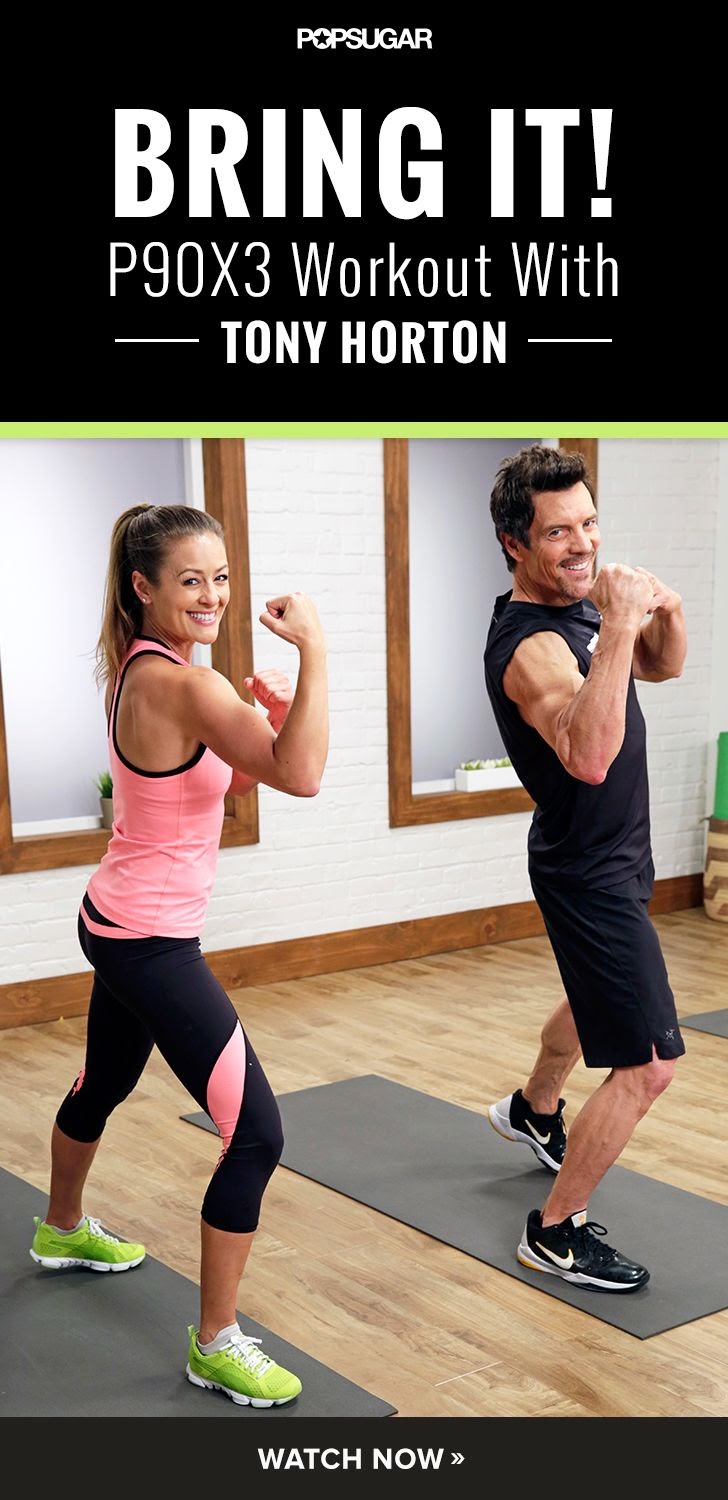
PopSugar has a 10-Minute P90X3 Workout with Tony Horton here. It's AMAZING! I just did the workout this morning for a mini-workout since today is technically my rest day. On a side note I desperately want to buy the her workout outfit. It's super cute and PINK...aka my favorite color!


Here's a P90X3 inspired Total Body Workout


Here's an Accelerated Series Chest Workout with Tony Horton


Let me know what you think! I love Tony Horton and his amazing workouts! Checkout his Youtube page here. All his videos are GREAT! I just wanted to share today some of his videos to help others get motivated to start working out! Here's where you can buy the videos by Tony Horton if you are interested.


<3 Kelly Jean


Friday, October 24, 2014

DIY Halloween Wreath


Happy Almost Halloween everybody! I found that cute little metal pumpkin basket at my local Marshall's. I think it would be super cute to hold candy, but you might need big pieces of candy so that it doesn't fall through the holes. I love decorating for the holidays. This is my first year as a homeowner so I have to basically start from scratch. For now I'm doing my best to DIY what I can to also not go bankrupt decorating my house. My first DIY of course was to create a Halloween wreath for my front door. As you can probably tell I'm sort of obsessed with having wreaths for every season/holiday. This year I found the perfect time to get the supplies for my wreath while Michael's was having a sale for 40% off your entire purchase, including sale items. That allowed me to get all my supplies for under $20!!! That's a great deal, especially since many wreaths are close to $100 on Etsy!


I used: 
Celebrate It Glitter Tulle 8 yards x 3 
1 bag of Glitter Colored Balls and Purple Glitter Spiders


I started by weaving the glitter tulle through the many rims of the wire frame. I weaved and weaved and weaved. I made sure to pull a thick enough bunch through each row many times to make it look fluffy. I would also periodically stop to fluff the poofs. As you can tell from the picture probably using glitter tulle is pretty messy. By the end my feet, my pants, my table, and my floor were all covered in black glitter. It took many days of vacuuming to clean up after this DIY project.


After I was finished weaving I then used my hot glue gun to glue on the different colored balls and purple spiders. My husband said I can make the inside of the house as cutsey and homey as I want, but the outside has to be creepy. I did my best to make my wreath "creepy".  While gluing on the spiders I allowed the little string that comes off the glue when using the hot glue gun to spread across the wreath at parts. I figured that would make it a little more "realistic" so that it would look like it had parts of a web. I went for mostly a spider theme this year for our outside. I will also be buying some of the fake "webs" they have at Target to put on my bushes out front.

Here's my end product...


I did however splurge and buy this amazing cat...


I love this thing! The head turns periodically so sometimes when it's just right it'll turn as your driving around the curve to get to my house. It's creepy and awesome! I have multiple families that have come to our house to check out the kitty cat with their kids. I actually got the chance to meet one of my neighbors because of the conversation piece this cat is.


<3 Kelly Jean


P90X3 Review -- Block 1 So Far


My husband and I are now at Week 4 with P90X3. OMG! I really can't believe we're still going! This is my first time literally in my life actually continually sticking to working out. I"m waiting to post my before pictures after we fully finish Block 1, which is 30 days from the start. At that point we take progress pictures and get stats. Then I'll have something to post to compare the two pictures. Recently we've started drinking the Results and Recovery Formula after our workouts to minimize soreness and to help us get more out of our workout. It taste like a Creamsicle Popsicle...especially if you add a little ice to your drink.


This was my dinner last night. I threw together a salad with all the veggies we had in our fridge. I also baked some tofu to add a little extra protein and make my meal more fulfilling.


Here is how our first 3 weeks have gone with P90X3.

My favorites from Week 1-3 were Yoga X, Agility X, and The Warrior. My choice of Yoga X is obvious because I have always been a Yoga fanatic. During college when I could scrape the money together I would pay for the trial periods at a Hot Yoga location near my apartment. I love love love Hot Yoga. With Agility X it's not an obvious choice since I sprained my ankle doing that video during Week 2. I blame myself entirely for that accident however. I would never want to warn people away or scare people from doing Agility X as long as you heed mine and Tony's warnings. After pressing play on each video Tony Horton explains stresses the importance of having the right shoes. He tells you every time that you do not want running shoes, because that is not the workout you are doing. I ignorantly chose to ignore that fact. I mean of course Tony Horton has no idea what he's talking about....yeah right. He's 55 and in amazing shape. Finally, The Warrior was another one of my favorites. This workout reminded me a lot of the bootcamp and bodyworks classes I used to attend at L.A. Fitness. Don't get me wrong, I loved all the videos in some way, but I definitely had my favorites that I will continue to fit into my workout regimes even after I finish my 90 days.

Within the next few weeks I will also be adding Beachbody's product Shakeology into my meal plan/healthy lifestyle regimen. I've heard a lot of great things about Shakeology from friends so I'm dying to try it and see how it helps me with my weight loss journey. I've been feeling pretty frustrated because my husband is just dropping off pounds while I continue to struggle. I really hope trying Shakeology helps me!!


Here's a great video on the benefits of Shakeology. I will continue to update on my results and thoughts on P90X3 as well as Shakeology.


<3 Kelly Jean