Pages

Friday, May 13, 2016

Superfood Smoothie {Dairy Free}

For a good portion of my life I've had stomach issues. I've taken Prilosec, Zantac, Pepto Bismol, Tums, etc. You name it and I've probably tried it to help me with the pain I feel after and sometimes before eating. I've tried to really clean up my diet since having my son and struggling to loose the last 15 extra pounds I gained during my pregnancy. Recently, I have decided to go completely dairy free. At first it was hard because I am an avid fan of cheese on everything, but the longer I go without the easier it gets. An added bonus to keep me from ordering the cheese coated pasta is the fact that now my stomach is feeling much better. At first I was just switching out regular milk for coconut milk, almond milk, lactose free, and the soy varieties. However, as I'm getting more strict about it I'm noticing more and more that many packaged items I was using the ingredients say "Contains: MILK". My favorite protein powder even contains dairy! :( I was so sad about this because this seemed to be the only brand I could find where my smoothies didn't taste gritty. I have yet to be able to find a Dairy Free version of Optimum Nutrition protein powder, so now I am on the hunt for a Vegan protein powder. Currently I'm trying Vega Protein & Greens Vanilla. It's okay, but it's not my favorite. It has an odd aftertaste and makes the texture of my smoothie more gritty. I'm curious what other vegans like to use as protein powder.


No matter what protein powder I use I still have a favorite for my smoothie mix. Lately I'm obsessed with putting chia seeds in everything. I've even been looking up recipes to make chia seed pudding or chia seed gels to drink. I love Mama Chia drinks but the sugar content seems higher than I'd ideally like. To make the smoothie above in my Ninja blender I threw in frozen strawberries, spinach, 1/2 a banana, chia seeds, unsweetened So Delicious coconut milk, Vega protein powder, and a handful of ice. I can't seem to make green smoothies that look green, but my guess is that the ones you buy are full of green food coloring. I'll have to experiment more and see how green I can really make my smoothie. 

Thursday, March 3, 2016

Meal Planning with Hammer & Chisel


As I mentioned previously I'm now doing a workout program called The Master's Hammer & Chisel with my husband to help me loose the pregnancy weight I gained. Before starting our new workout program (Hammer & Chisel) we had to take a quiz to see what meal plan we would be following. Depending on gender, starting weight, lifestyle, and goal you got a letter that represented your calorie and container options. I got Plan B with 1,500-1,799 calories. This was less calories than I was used to since I was still sticking with the calories I was eating during my pregnancy. The containers/colors shown in the table above relate to certain types of food as explained below.

Source
After I got this information I went to work researching healthy recipes that could work within these goals. I have to say that it was not easy at all to come up with my Week 1 Meal Plan. I struggled to cut back on my carb/starch and dairy intake. I also struggled finding vegetarian options for most of my meals {I'm about 90% vegetarian since I still eat lunch meat and sometimes seafood}. I typically eat a lot of Mexican food and pasta recipes. However, clearly eating as much spaghetti and enchiladas as I was previously was not working for me in the long run so I came up with my meal plan shown below.


For week 1 I struggled with still feeling hungry and lethargic at times. According to the nutrition book you can add in green and red if you're hungry or purple and blue if you're lacking energy. To prevent myself from being miserable since I didn't plan on starving myself, I added in some veggie snacks to my day when needed. Before I could start my workout after my second snack I ate a second serving of carrots since they have fiber to help me keep me full to power through my workout. I was definitely missing my sugar filled Zone Perfect Protein Bar that I normally eat pre-workout right about now. 


I was loving my usual turkey sandwich (minus the mayo and cheese I usually used). However, the plain greek yogurt was a struggle where I was constantly trying to find mix-ins to improve the taste. For some reason plain greek yogurt tastes like sour cream to me, and it's just not appealing to eat a bowl of it. I threw in some strawberries one day and another day I blended it up with blackberries. Another thing I was struggling with was my new way to drink coffee. Typically I pour in my flavored creamers until my coffee basically looks like milk. Now I'm allowed 1-2 tbsp of Milk plus any extracts or spices I'd like. I blended my coffee with 2 tbsp of Fairlife Fat Free Milk, 1 tsp Vanilla Extract, 1 tsp Coconut Oil, and a sprinkle of cinnamon. It was okay at first. I think it'll take time for my body to adjust and learn to like the healthier options, but it'll definitely be worth it in the end to feel better about myself and live longer. 

Source


Wednesday, March 2, 2016

A Soon to be Fit Mom

During my pregnancy even with my attempts at staying active and eating reasonably healthy, I did give in to cravings (a.k.a. Dunkin Donuts Munchkins) and take a lot of naps on the couch (especially towards the end). Due to all this I ended up gaining more weight than I'd have ideally liked. I don't know fully what I gained since during my last 3-4 months I had to stand backwards on the scale since my belly stuck out so far. I know the ideal for my height is 25-35 pounds MAX. I'm pretty sure I gained 35-40 pounds instead. Just thinking that makes me cringe!!


After giving birth and wearing my Belly Bandit I ended up loosing a little over 20 lbs. Sadly that has still left me with 15-20 lbs to loose to get back to my pre-pregnancy weight. I'm not 100% focused on the scale right now, but I am pretty determined to loose that loose/soft lower stomach feeling I've had since giving birth. I want my stomach to go back to feeling tight. I know it's WAY harder after having a baby, but I'm pretty determined.


I started out by going on walks daily by the time I was 6 weeks postpartum and my doctor gave me the okay to start working out. I would walk the neighborhood with my son in his stroller. I really enjoyed this at first until it started getting cold here in Georgia. I am in no way a fan of the cold, so I switched my workouts up and started doing DVD fitness programs with the hubby. 


We tried going back to our beloved P90X3 program that helped me pre-pregnancy get a toned body. For one thing workouts with A LOT of jumping do not mix well with a newly postpartum breastfeeding Mamma. I had to wear 2-3 sports bras just to avoid insane breast pain while jumping. My other issues I won't go into detail, but let me just say I was not a fan of jumping. Add to that the fact that we had an almost 2-month old baby who was not an amazing sleeper and tended to cry for what seemed like forever as soon as 4:00 pm rolled around (aka our typical workout time). There were many typical 30-minute workouts that took over an hour since we would take breaks to tend to our son. 


Sadly, now almost 6-months postpartum I still have not lost all the weight that I wanted or gotten the body back that I had before. I think a big part of my issue is figuring out nutrition that works with my new body and my new appetite. Breastfeeding makes me feel like I'm STARVING all the time, which leads to incessant snacking. What makes it even harder is the fact that I'm at home so it's easy to just keep eating without realizing how much you've eaten by the end of the day. Due to all this I've officially decided to start a whole new program that incorporates cleaning up your nutrition and learning correct portion sizes. Hopefully our new program The Masters Hammer & Chisel will get me where I'm wanting to go. 


Monday, February 22, 2016

Welcome to Motherhood


Over a year ago I found out I was pregnant with my first child. Based on how the rest of my life has gone, I was not surprised that I happened to have almost EVERY possible symptom out there while pregnant. I was nauseated basically my entire pregnancy and only survived due to being prescribed Zofran from my OBGYN. Not only was I nauseated but I was incredibly exhausted all the time. Other than work and working out as soon as I was home I was napping on the couch.


After spending months dedicating myself to hardcore/high-intensity workouts it was hard for me to transition to lower intensity and lower impact workouts. I did LOTS of yoga while pregnant after researching the many benefits of yoga related to labor and pregnancy symptoms. It helps with balance as your body grows, it helps to relieve back and hip pain, teaches you some breathing techniques that come in handy during labor, slows you down and encourages you to connect with your growing baby, and finally it helps with your circulation. I tried out many prenatal workouts and I also dedicated myself to going on a 2-3 mile walk daily.


My daily walks were probably my favorite part of my day. It was nice getting out to enjoy the outdoors and it was peaceful. I never listened to my iPod during my walks because I wanted to take the time to listen to the world around me. Being as short as I am I had many times on my walks that strangers I passed by would ask if I was trying to walk into labor...this started as early as 5 months into my pregnancy. I appeared to be carrying low and carrying a pretty big baby. 


At 36 weeks I literally felt like I would burst any minute. I managed to last right up to 3 days before my due date when my son decided to make his appearance. My labor was pretty normal and fast with my son arriving healthy and normal. Due to how big he was, how small I am, and the fact that he was my first child I ended up hemorrhaging and having to stay in the hospital 4 days to make sure my body was healing and behaving normally. 


I think my saving grace when leaving the hospital was my Belly Bandit. I wore that thing religiously all day and night, other than when I was showering. This thing was AMAZING for my recovery. It really helped to tighten and shrink everything up and only 2 weeks postpartum I was able to fully cinch the whole thing in. With my amazing results I've been recommending it to everyone I know. For baby #2 this will definitely be in my hospital bag again. 


Saturday, February 14, 2015

Fitness Must Have - FlipBelt


I've recently gotten into hiking and walking a lot outside whenever the weather here in Georgia cooperates with my plans. My only issue when I'm walking usually is with the fact that 99% of my workout capris, pants, and shorts do not have pockets. Hello, where am I supposed to put my keys, phone, ID, snacks, etc.? For awhile I would try to slip my iPhone into my pants right at my hip at the top of the band on my workout pants. However doing that usually ended in disaster with my phone crashing to the concrete ground. Thankfully I'm lucky enough to not have broken a phone yet doing that because of my phone case {knock on wood}. Then I randomly saw an add for a FlipBelt and knew I had to have it. I automatically fell in love as soon as I received my FlipBelt. 
Source

Here are the benefits to using a FlipBelt
  1. Machine Washable {and dryable in the dryer} - This is amazing because as you all probably know your workout clothes and accessories tend to get sticky when you're working out when they get coated in sweat. The same thing will happen with your FlipBelt so just throw it in the washer after use and presto it's like new.
  2. The FlipBelt fits your iPhone 6+, credit card, chapstick, license, cash, keys, protein bars, epipens, etc.. There's even a key fob on it to hook your keys too then slip inside one of the multiple pockets {4 pockets total - 2 in front and 2 in back} on the belt.
  3. No chafing - I have worn mine multiple times and have yet to ever have an issue of it riding up and rubbing against my skin and chafing my skin.
  4. As soon as you stash all your fitness goodies and necessary essentials in the pockets, flip it inwards to securely lock in your items for some extra security while you train.
  5. Available in 10 different colors to match your wardrobe!

This thing will come in handy hiking, biking, walking, running, park time with your kids, dog parks, running errands, heading to the gym, at the airport, rock climbing, etc. Seriously, check out flipbelt.com for this awesome fitness accessory if you don't already have one. You can also find it on Amazon and REI. 


Body Beast Build Phase Workout Samples


These workouts are from Body Beast Build: Back and Biceps. In the top left I am doing a dumb-bell pullover. This one works your lats and you can definitely feel it. In the left middle I am doing a Reverse Fly. I have a love hate relationship with these. My muscles love them because it helps them build, but I hate them. On the bottom left I am doing a close grip pull-up. We have one pull-up bar in our workout room so I modify and use resistance bands. I am increasing the weights on my bands as I get stronger. I'm now using Red + Black which is 40-50 lbs. On the right top I am doing a Bicep Curl. These and Rows are a weight workout that comes easier for me. On the bottom right I am doing a one arm row. This is probably my favorite strength move because I can usually go pretty high compared to the rest of the moves. 

These workout moves are from Body Beast Build: Legs. On the top left I am doing a Regular Weighted Squat. This I tend to go pretty heavy with my weights because my legs are one of my stronger parts. On the left middle I am completing an Alternating Lunge. You switch with stepping forward into a lunge with either your right or left leg while holding two weights in your hands. On the bottom left I am doing a deadlift with dumbbells. If you have limited equipment and don't have a bar you can use dumbbells and get the same results. On the right top you can see me flexing. I wanted to show what my calves flexed looked like during the beginning in Build Phase so we have something to compare to later. On the bottom right I am showing calorie burn between my husband and I. During strength training he seems to burn at least double what I do.

Thursday, January 29, 2015

My Thursday Top Ten - Tofu Recipes


As a Vegetarian I have to be really creative with my meals to get enough protein and nutrients in. One of my favorite sources for protein is Tofu. Tofu is also low in fat and gluten free. I like my Tofu extra firm, but you can always try the regular firm, lite firm, tofu plus, cubed, or silken. For the most part in the past I mainly used my Tofu in stir fry, but lately I'm finding all kinds of new tofu recipes to switch things up. Here are 10 of my favorite tofu recipes that are out there.


10. Crunchy and Spicy Baked Tofu Nuggets - These are a great alternative to Chicken Nuggets for the vegetarian or vegan food lover or even a low carb version of tater tots. I'm used to eating my tofu lightly toasted in stir-fries so I love the extra crunch you get with these nuggets. The spices you add in also give you that little kick to make it interesting without needing to guzzle a whole glass of milk to cool off. 


9. Loaded Crispy Tofu Tacos - I love mexican food any night of the week, so when I found this tofu taco recipe I instantly jumped on it. Add to the fact that it's a tofu recipe with Sriracha and I was in total heaven. If you have not tried a recipe with honey, tofu, and Sriracha yet you should probably stop what you are doing and go make something now. It's literally that good. These tacos are so good that even meat eaters who are scared of tofu or think it's "gross" will love them and be asking for seconds.


8. BBQ Tofu - This super easy BBQ Tofu recipe is a great solution when you are craving that sweet BBQ flavor, but don't feel like having to tear up some pork or chicken to make your own BBQ sandwich. I've eaten these as a main dish with broccoli and baked beans or on a whole wheat bun with slaw. They are amazing either way. 


7. General Tso's Tofu - This recipe is a great option when you're craving chinese, but don't want the yucky feeling you get after leaving most chinese restaurants. This recipe turned out mildly spicy so it's another one that won't have sensitive eaters running for the milk jug. Plus this recipe is super easy to make and super cheap. Most of the ingredients are items you probably already have around the house. I only had to buy 3 things which cost me around $5 and left me with enough to make this recipe many, many, many times.


6. Nemo's No Fish Tofu Tacos - I added this recipe for all the families out there that go vegetarian or just want to try out something new. Maybe your kids are super picky about the smell of fish or just like their food with cool shapes, yet you don't want to buy the pre-shaped frozen food full of all kinds of unhealthy crap. This is the perfect solution. They are so cute and easy to make. If you don't already have a fish cookie cutter you can buy one for pretty cheap on Amazon. 


5. Vegan Spinach Artichoke Lasagna Rolls - This is a great healthier alternative to your usual lasagna or lasagna rolls. Here you use tofu instead of ricotta for that smooth creamy center. Once you try it I promise you will never go back. I was shocked at how good it actually tasted and it had way less calories than my normal lasagna. 


4. Chocolate Peanut Butter Mousse - Who knew you could make a dessert as tasty as mousse out of tofu? Not this lady, until recently. I'm here to say that this recipe does not disappoint. It's delicious and only 4 ingredients (1 extra ingredient if you want a peanut garnish). Hello, that's like the easiest dessert ever. I'm thinking the next time I make it I'll also try subbing in PB2 for the creamy peanut butter to make it even more healthy. 


3. Southwestern Tofu Scramble  - This is a great alternative to regular scrambled eggs for any vegans out there or those that just don't like eggs. This is a hearty breakfast that definitely does not leave you wanting. Also with the tofu and black bean mixture you get a major protein boost to start your day off right. 


2. Low Carb Tofu Fries - I just recently found this recipe for Tofu Fries and I almost died from excitement. I love finding new low carb recipes to switch out items that I was previously eating. Who knew you could make french fries out of tofu and it would actually taste good, let alone taste like fries. These are amazing. The Asian Ketchup recipe was a little too spicy for my taste so I ended up using regular ketchup to dip these yummy treats in. I will definitely be making these next summer during our many pool parties. 


1. Sweet and Sour Tofu Stir-Fry - Last but not least is my all time favorite Sweet and Sour Tofu Stir-Fry recipe. This is a definite regular in my house for dinners. We love switching it up to try different veggies with it and even going super low carb and nixing the rice. Whatever way you make it this recipe will never disappoint. It's spicy, sweet, and perfect for a quick and easy dinner recipe. 


Monday, January 26, 2015

Body Beast - Measurements and Pictures

Before starting Body Beast we took our before pictures and measurements. This is smart to do so you know how you've changed and when you finish the workout you can send your pictures in for free gear (Body Beast T-Shirt). You want to take a picture of yourself from the Front, Back, and Side. You can have your arms at your sides or flexing in the position I'm showing above. After taking pictures we did the typical measurements of shoulders, bust, waist, and hips. However with Body Beast it also requests you to measure your right/left biceps, right/left quads, glutes, and right/left calves. My main areas I want to work on with Body Beast are my butt, thighs, calves, biceps, and my abdominal area. If you need help with how to measure your body for you bust, waist, shoulders, and hips here is a guide. 


Source

Now that we had our measurements, weights, and pictures {and a basic idea of our meal plans for the weeks, which will change in the upcoming weeks as my dietary needs change} it was time to start our workouts.


Sunday, January 25, 2015

No Cheese Avocado Quesadilla


Are you looking for a healthier version of your favorite mexican dish of quesadillas? Or maybe you're lactose intolerant and can't eat the cheesy quesadillas that so many others love? Well, I have found the perfect solution. These No Cheese Avocado Quesadillas are my new favorite go to for lunch and dinner when I'm craving mexican. I like to pair it with some mexican yellow rice, cauliflower rice, or even a super tasty spinach salad. This recipe is Vegan and gluten-free (with gluten free tortillas). Plus you can add all kinds of different extras with the avocado to make it even tastier. 


No Cheese Avocado Quesadilla
Serves: 1

Ingredients

  • 1/2 Avocado (more if you prefer)
  • 1 large tortilla or 2 small tortillas
  • 1 small roma tomato, diced
  • Seasonings of choice: Paprika, Cumin, Garlic Powder, etc.
  • Optional Toppings: Spinach, Black Beans, Chicken, Green Chiles, etc.

Instructions

  1. Smash avocado and spread out on one half of the tortilla. Sprinkle with any seasonings. {I like a pinch of garlic powder and cumin in mine.} 
  2. Add diced tomato and any other desired toppings.
  3. Fold over the top half of the tortilla and place on a non-stick skillet over medium heat. 
  4. Heat for 1-2 minutes per side until warmed through.
  5. Enjoy! I like to dip mine in Salsa.


Friday, January 16, 2015

A Healthier Chunky Monkey

Lately I have been craving the Ben & Jerry's Chunky Monkey ice cream. Even when it's cold and dreary out I seem to still crave ice cream. I am literally obsessed with my ice cream. Sadly though Ben & Jerry's Chunky Monkey is in no way really "good" for you or "healthy". Therefore, I had to figure out a way I could fulfill my cravings while still living a healthier lifestyle. That is where my new recipe for my morning shake came in. I decided I had to try to recreate Chunky Monkey with Chocolate Shakeology. I was very pleased. It was delicious!! I literally felt like I could freeze it a little, throw on a few walnut chunks, and then scoop it out with a spoon for dessert. I love it when healthy food actually taste good. Now I can get my ice cream fix while still getting all my superfoods and nutrients for the day.


Chunky Monkey Shakeology

Ingredients

  • 1 scoop/packet of Chocolate Shakeology
  • 1 cup of Unsweetened Almond Milk
  • 1 banana
  • 1 handful of ice
  • optional: 1 scoop of Protein Powder (Vanilla or Chocolate)
Instructions
  1. Throw ALL ingredients into the blender
  2. Blend until smooth
  3. Smile with extreme pride and enjoy your healthy copycat chunky monkey protein and superfood filled shake. 


Sunday, January 11, 2015

Body Beast for Women - Schedule and Equipment


The hubby and I are finishing up P90X3 this weekend and will be starting a new program Monday. We have decided to complete Body Beast next. After much discussing we've decided it's best to build muscle now while it's cold then switch and blast away fat once it's getting closer to summer with a high intensity cardio program like Insanity Max: 30. P90X3 was a great starter program for us to begin the whole process of losing weight and gaining muscle. I feel like I've built some muscle in my legs and maybe a little in my arms. I want to define my arms more and tighten/tone up my stomach even more. I also want to do this program to help show other women that they too can complete Body Beast. As you look through the catalog or research Body Beast it may intimidate you, so I'm here to help break it down and help make it female friendly. 


Since I mainly want to define my body just a little bit more I'm choosing to do the Lean Beast program within Body Beast. This program is great for building muscle while also losing the extra fat coating my muscles. Block 1 starting out is the Build Phase. This phase focuses on synergistic muscle groups, allowing you to get strong and build a foundation to work on.  This phase continues for 6 weeks long. you workout 6 Days and have 1 day off. The workouts are different for each of the 3 weeks. 

I have different equipment and supplements I'll be using to gain the optimum results. Based on the cost I am going to try going through the 90 Days without getting the extra supplements for Body Beast that are suggested (Hardcore Base Shake, Fuel Shot, M.A.X. Creatine, and Super Suma). 

  • On the top left is P90X Results and Recovery. This is an orange creamsicle after workout drink that helps ease soreness and optimize your results. It taste amazing and really helps me not be in agony after waking up the day after a workout. Plus it's all natural with no artificial flavors or sweeteners.
  • On the top middle is the Beachbody Jump Mat. I use this since I workout sometimes on hardwood floors. This super shock resistant mat protects your knees, back, and ankles from injury. I also just like the cushy feel of it beneath my feet while working out. 
  • On the top right are Resistance Bands. They can provide up to 100 pounds of resistance, and work amazingly well as an inexpensive substitute for dumbbells. I use them with a door attachment to provide a great alternative to regular pull-ups. 
  • On the bottom left are Dumbbells. I will be using the massive set that my hubby and I have for the majority of the weight lifting workouts. We got most of our dumbbells through Amazon or from Target. 
  • On the bottom right are Stability Balls. We have a weight bench that my husband will be using, but since we can't easily fit 2 into our workout room currently, I'll be using a Stability Ball. I like the fact that while I'm using a stability ball I can also work on training my core and stabilizer muscles. 

  • We can't forget my Shakeology that I'll still be using while completing Body Beast. As with P90X3 this will continue to be my breakfast and will therefore be calculated in my calorie count for the day. I love the ease drinking Shakeology gives me since I never have to plan a Breakfast. I just wake up, mix it with whatever I feel like, and I'm ready to go in less than 5 minutes. 
Now it's time to meal plan. As soon as I fully figure out my meal plan for Body Beast I will post that on my blog. 


How to Cold Brew Coffee

Like many others out there I am a coffee addict. I feel like I drink coffee every single day, sometimes even twice a day. I like hot coffee, cold coffee, espressos, lattes, and cappuccinos. My only problems with coffee drinks are sometimes how unhealthy they can be and also how acidic they are. There are many times I end up getting heartburn due to drinking coffee, yet I still continue to drink it. It really doesn't make sense when you think about it. 


Well, I recently received a Toddy T2N Cold Brew System for Christmas from my Sister-in-Law. The Toddy system is used to cold-brew your coffee. Cold-brewing ground coffee beans produces a coffee that is naturally low in acid, approximately 67% less acidic than coffee brewed by conventional hot-brew methods. Well, you may say hey I don't like iced coffee. That's totally okay. Cold-brewed coffee can be made one cup at a time, at the strength you prefer, and the temperature you prefer. You simply add steaming hot or iced water or milk to determine the temperature. You can also microwave it without ruining the taste. Now that I have my Toddy I wanted to test it out.


I made a Caramel Iced Coffee. It was super delicious. It wasn't watered down tasting like the iced coffee I normally have from brewing with my Keurig. Here's how to brew your own...


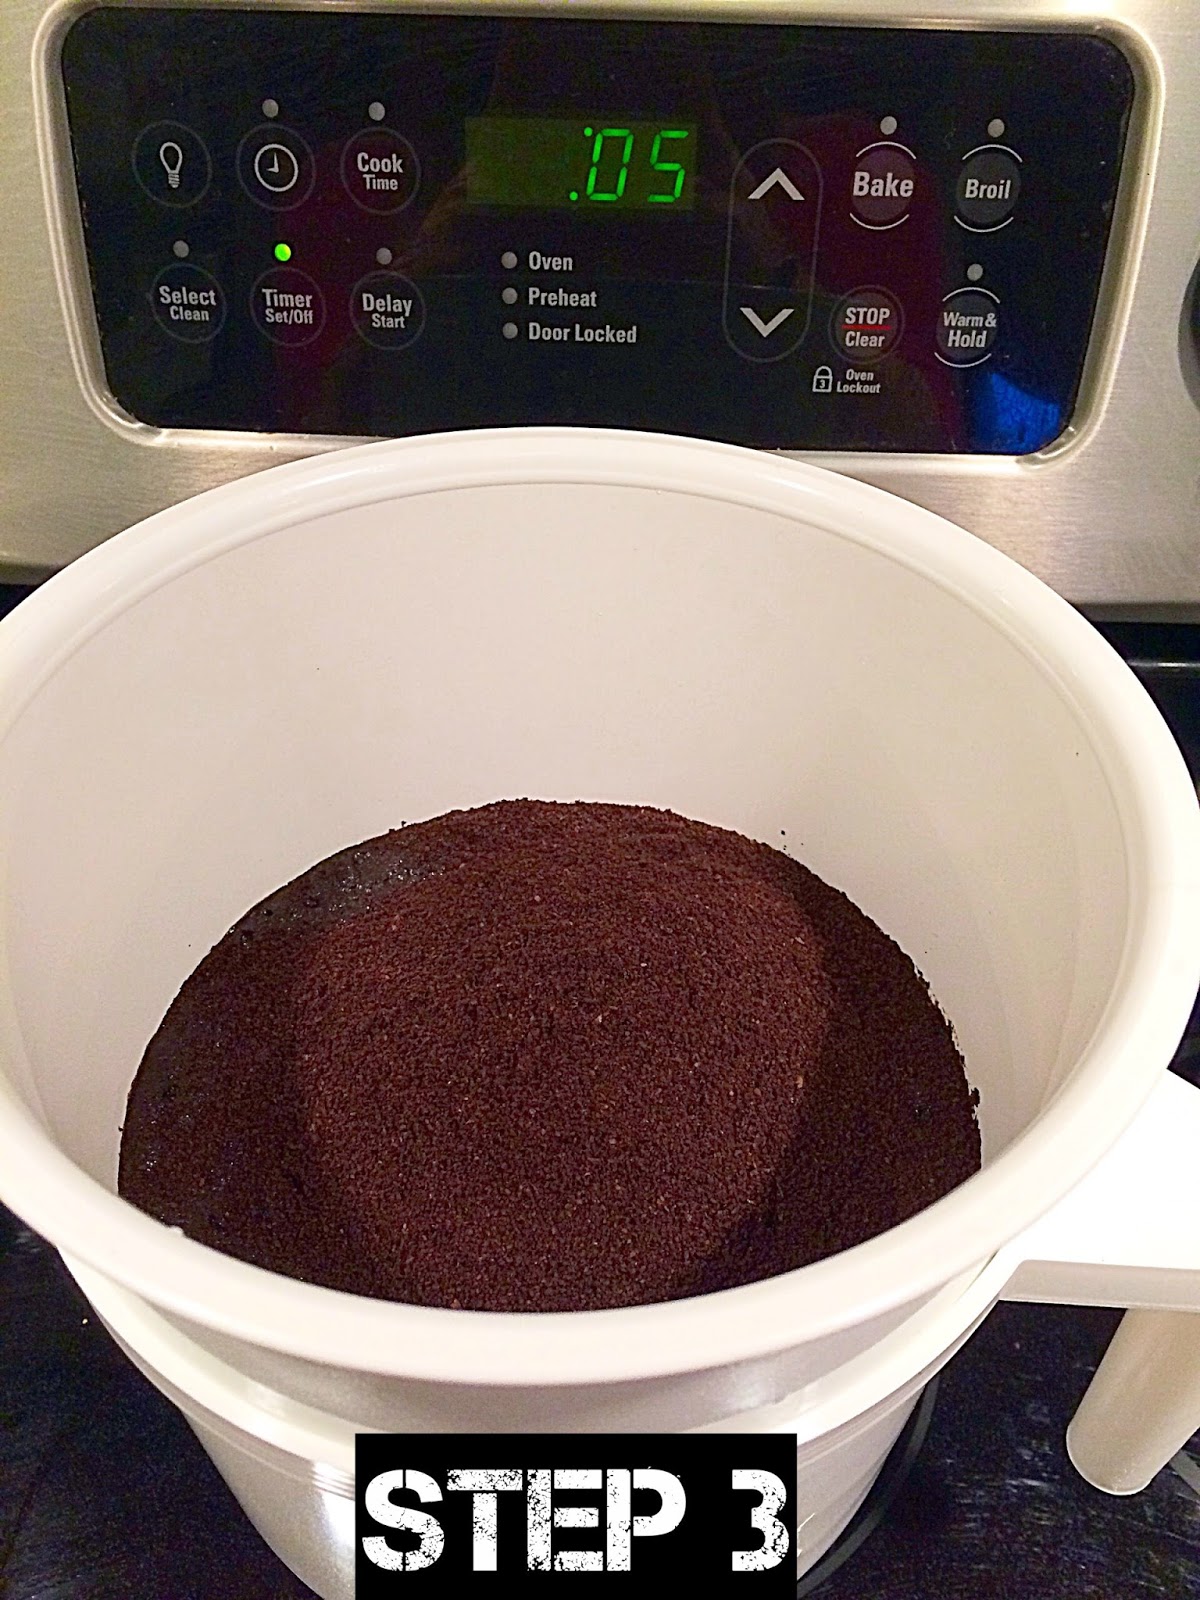
For the best flavor you want to use freshly ground coffee beans and filtered water. I currently don't have a Coffee Grinder so I bought previously ground beans. First, insert the stopper into the outside bottom of the brewing container. Then you want to dampen the included filter and insert it into the bottom of the brewing container. Next, add 1 cup of filtered water into the bottom of the Toddy brewing container and 6 ounces of ground coffee. 


Slowly pour 3 more cups of filtered water over the grounds, in a circular motion. Then, add the remaining 6 ounces of ground coffee.


Now you want to wait 5 minutes before slowly adding the last 3 cups of filtered water. At this point DO NOT STIR! If you stir the grounds it can result in a clogged filter.


Once all the water has been added you want to lightly press down on the topmost grounds with the back of a spoon to ensure all grounds get wet.


Then, steep your coffee grounds for 12-18 hours to create a smooth, rich flavor. My house smelled amazing while the coffee was steeping. Everyone kept asking if I had recently brewed coffee in the coffee pot, but it was just the grounds soaking in my Toddy. 


After 12-18 hours you want to remove the stopper and let your coffee concentrate flow into the glass decanter. 


Once the concentrate has fully drained into the Glass Decanter place your cold brewed coffee into the fridge to cool. It will stay fresh for up to 2 weeks in your refrigerator.


I mixed my cold brewed coffee with Silk Almond Milk Light and 2 pumps of Caramel Syrup to make a Caramel Iced Coffee. After my first attempt at using my Toddy I am highly impressed and would definitely recommend buying one if you like iced coffee.


If you don't want to spend the money on a Toddy system right now you can also try out this method of cold brewing your coffee from All Sorts of Pretty. 


Tuesday, January 6, 2015

Greek Spinach Veggie Burgers

One of my favorite meals as a vegetarian are veggie burgers. I'm a huge fan of finding new recipes for them or finding them out at restaurants. One of my new favorite burgers is a Greek Spinach Veggie Burger. It's an amazing recipe because it has very few ingredients and it's pretty healthy. 


After gathering all my ingredients I measured out the necessary amounts of each. For the spinach I first opened the package and pressed it between paper towels. The last time I made this recipe I forgot that step and the burgers were really watery and didn't make easy patties. If you take the time to pat dry the thawed spinach it mixes much better. 


Start out by mixing together Olive Oil, Dillweed, Garlic, and Oregano in a medium bowl. 


Next stir in the stuffing mix to coat thoroughly. As I was stirring I also used my spoon to mash up the stuffing even more. This again is another step that helps to make it much easier to create patties. 


Now add 2 eggs and stir to combine. The eggs are an essential part because they help to make the recipe more sticky. In recipes like veggie burgers or desserts eggs are pretty essential. 


Now add in the thawed spinach and mix together. As you can see since I took the time to pat dry and drain the spinach of some of it's water this mixture doesn't look soaking wet. 


Finally, add in the crumbled Feta Cheese and combine everything together. I love the smell of Feta Cheese. I'm contemplating next time trying out Blue Cheese to see how those flavors meld rather than the Feta Cheese. 


Once everything was combined I molded them into round patties on a pan that had been sprayed with Pam. I cooked them at 375 degree for 10 minutes per side. This helped my patties to be nice and slightly crunchy to make the perfect veggie burger.


What's your favorite non-meat recipe? Do you have a creative veggie burger recipe that others always ask you to make?